Showing posts with label Summer. Show all posts

Tuesday, September 11, 2012

8. Feta & Dill Breakfast Quesadilla


I know I recently waxed poetic about oregano, but dill is another one of my very favorite herbs.  Actually, I love all herbs and herb-flavored foods with ONE exception: Cilantro.  I despise cilantro.  Don't try to convince me it's good, because I won't have it.  This is not to say I won't eat things that have cilantro in it.  Most salsas have at least a little bit of cilantro and I adore salsa, but as soon as the scales tip to the cilantro-extreme, NO ME GUSTA.

While oregano is definitely more versatile, dill has a crisp, refreshing herb flavor that is truly grand during the summer months.  Summer is winding down now, it's starting to be dark when I get up in the mornings and the Pumpkin Spice Latte is back at Starbuck's, but I had some feta in the fridge and thought I'd enjoy a summery breakfast one last time before I dust off my sweaters and boots.

Have you ever enjoyed a breakfast quesadilla?  They are both tasty and fun.  Similar to omelets or quiches, you stuff them with almost anything.

What you'll need:
  • 2 tortillas
  • 1-2 eggs
  • A bit of olive oil or butter
  • Crumbled feta cheese
  • Dill (fresh is best, but from the pantry is just fine)
  • Either a big frying pan or a panini press
I have the best-sized little frying pan in the world.  I should measure it so I could tell you what size it is, but I'd guess it's about 7 or 8 inches across.  It is the perfect size for my 1-2 egg breakfasts, whether it's an omelet or a fried egg.  It works especially well for when I make breakfast quesadillas because I can cook the egg into a perfect, thin circle, ready for placement on a cheesy tortilla.

 
First, I throw a little olive oil in my perfect little frying pan.  Then, I sprinkle some dill on top of it.  Unfortunately the dill from my herb garden died off several weeks ago, so I used the kind in a canister.

Next, I turn the heat on low-medium and while the pan is heating up a little bit, I whip up the egg(s).  I'll tell you that normally I would just use one large egg, but in this case I used a couple small eggs.  I have three "bantam" hens which are basically miniature hens.  Mine are all Japanese Silkies which are basically little fluffy muppets that freak people out when they first see them.  Anyway, the point is that since they are miniature chickens, they lay miniature eggs.  The general rule of thumb is that two bantam eggs are equivalent to one large egg.  This truly depends on the type of hen, or even the individual hen's egg.  There are some breeds of bantams that are practically the size of pigeons and lay REALLY small eggs.  Silkies are among some of the larger bantams and all three of mine lay a slightly different egg.  Because I often sell my eggs to friends and co-workers, I try to use the bantam eggs up on my own.  If someone buys eggs from me, I give them the biggest eggs and also try to include a large assortment of colors.  So, for this quesadilla, I happened to have an overstock of Silkie eggs and so I decided to use two of those instead of one of the usual big ones.  A couple of my Silkies actually lay kind of large eggs, so when I log the calories I usually estimate that two Silkie eggs is about 1.5 regular eggs.

I gently pour the egg into the pan,
pouring all around and not in the
same spot the whole time. This helps
from displacing all the dill into one spot.
Then I sprinkle some additional dill
over the top of the egg and cover the pan.


While the egg is solidifying, I pull out the other ingredients and get set up to assemble:

STEP ONE: Place tortilla on assembly surface.  This is also known as a counter or plate.  The tortillas I use are a brand called "Smart & Delicious" from La Tortilla Factory.  They have a lot of flavors, but I always get the 100% whole wheat.  If I ever have an option for 100% whole grain when it comes to ANY of my starches, that's almost always what I go with.  The best thing?  These tortillas are only FIFTY calories each.  If you actually read the nutritional content of things, you might already know that most tortillas are 100-200 calories a piece.  It's no wonder why I stock up on them when I can and find all kind of fun uses for them.

STEP TWO: Sprinkle feta over the tortilla.  It would be tastier with more than what is pictured, but I'm trying to limit my calorie intake, so I tried to keep my love of cheese slightly restrained.  For this quesadilla I used feta crumbles that come in a 6 oz. tub from Trader Joe's.  They have both regular flavor and also one with "Mediterranean Herbs" which is what I always get.  I love herby flavors.

STEP THREE: If you really only did about one egg, then it should probably be cooked by now. Slide it out of the pan and lay it on top of the cheesed tortilla.  See how perfect the size of my pan is for this?

STEP FOUR: More cheese on top!

STEP FIVE: Place the second tortilla on top of the whole shebang.

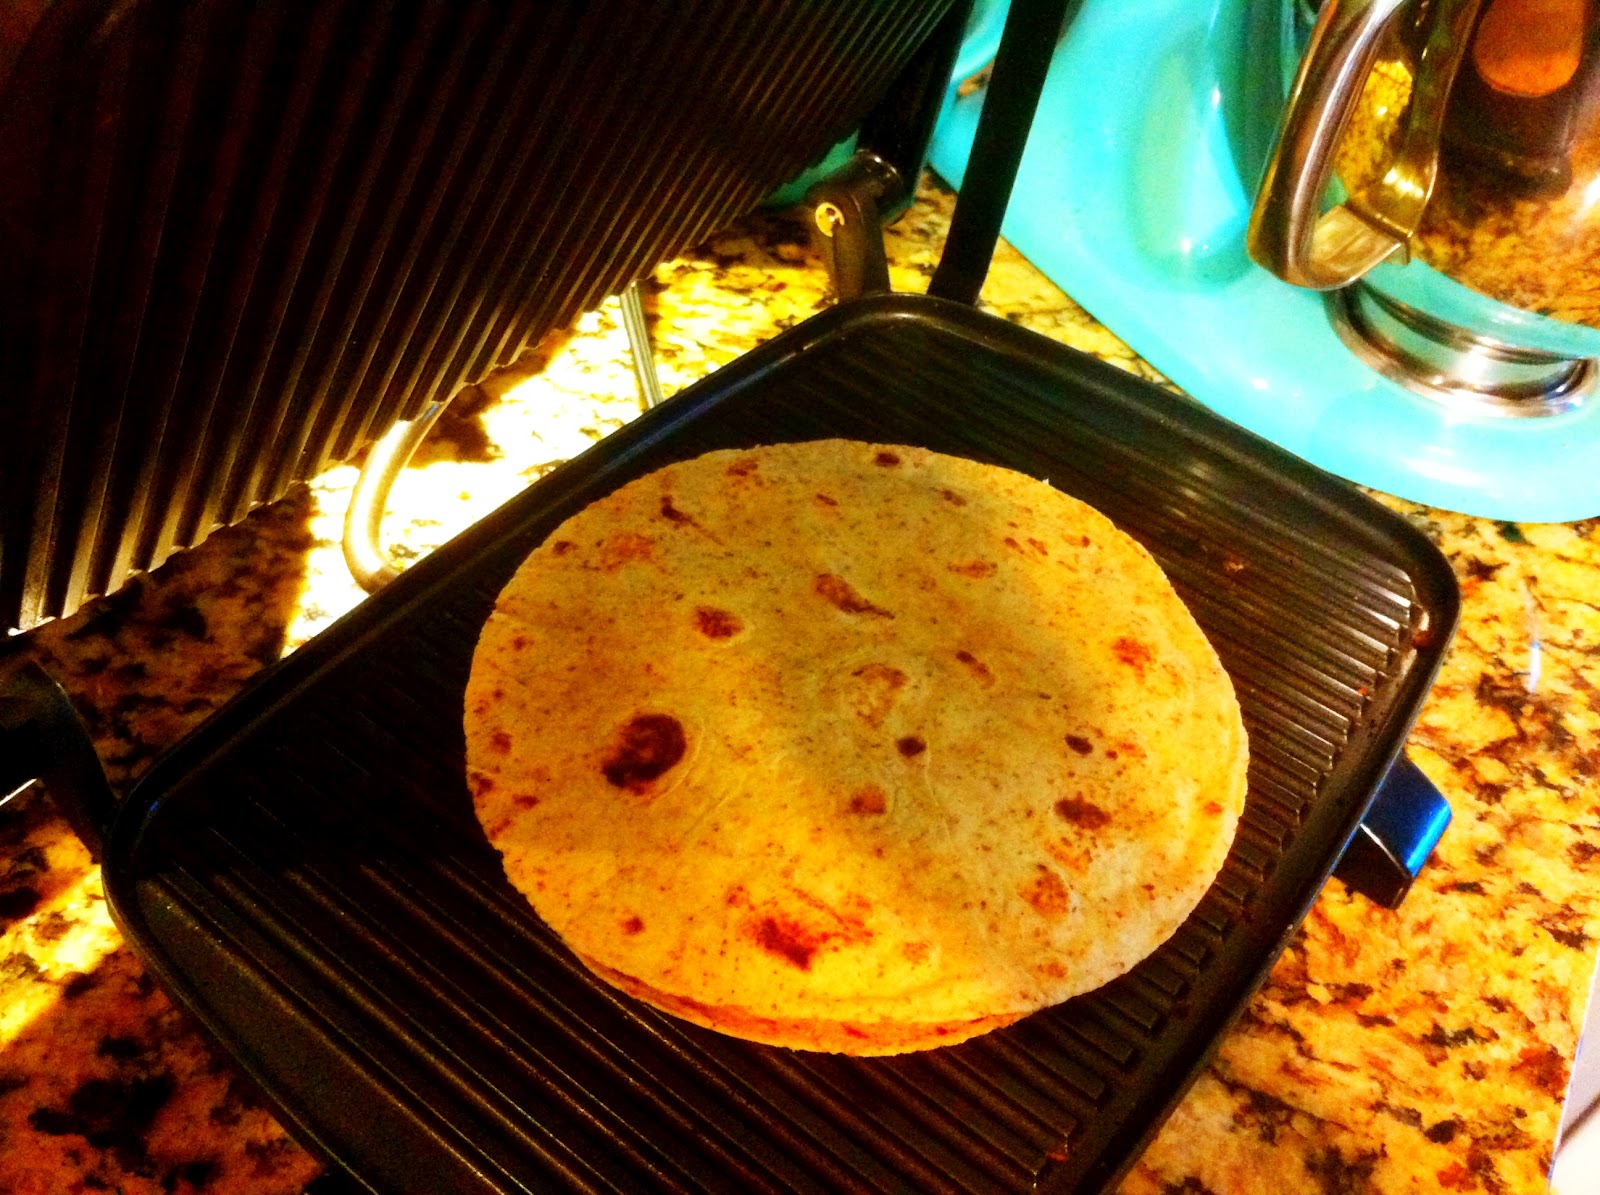
Ok, so now you have the quesadilla assembled, but it requires some grilling to make it delectable.  You could easily use a large frying pan or a griddle.  I really love using my panini press for these.  I pretty much love using my panini press for EVERYTHING.  If I'm really honest with myself, aside from all my sweet fiesta dinnerware, my panini press is probably one of my most-used wedding gifts. 


These little tortillas fit perfectly!  I also wanted to show a good side-view of the quesadilla.  Usually when you get a quesadilla out at a restaurant it is a monstrous thing.  These 50-calorie tortillas I are only about 8 inches across and with a little cheese and a single egg, it's actually a pretty small but very satisfying breakfast.  If you're the kind of person that eats in the car (I'm not) then this is also a good "on the go" type of breakfast.


I like my quesadillas to get pretty crispy, so I probably had this in the panini press for several minutes.  It doesn't hurt it at all to check periodically to get it to your desired "doneness."  If I wasn't always looking for ways to minimize my caloric intake, I would absolutely eat this with a little bit of Greek yogurt mixed with some lemon juice and dill, or full-blown tzatziki sauce.  But I love that ish way to much would end up using my quesadilla to scoop that creamy goodness down my throat and straight to my waistline.

In total, this little meal features 100 calories of tortilla, 70-90 calories of egg, 40 calories of feta (one of the many reasons I love feta is that strong flavor makes a little go a long way AND it's fairly low in calories compared to other cheeses), and 40-50 calories of olive oil.  I consider "low-calorie" breakfasts to be anything under 200 calories, but I don't think 250-270 calories for a filling and fun breakfast is too shabby!

Love & Eggs,

Laura

These two Silkie eggs brought to you by Sally, our little hen who thinks she's one of the big girls.

Wednesday, August 15, 2012

3: Sunny-Side Egg Caprese


One of my favorite things about summer is all the delicious produce, especially garden-fresh tomatoes.  My family always grew a few tomato plants growing up and it basically ruined commercial tomatoes for me.  As much as I love them, I usually avoid them at restaurants or sandwich shops.  I mean, when is the last time you ordered something with sliced tomatoes and got a rich, deep red, juicy, flavorful slice of heaven?  More likely, you receive a thin, barely pink, bitter to tasteless slice of nonsense.  Which leads me to the Caprese Salad... A tasty Italian invention that was intended to feature fresh mozzarella, ripe tomatoes, and fragrant basil.  Lots of eateries have them on the menu, but I will never order one.  

Luckily for me, mouth-watering tomatoes are available all summer long from my own garden, a friend's garden or the local farmers' market.  My area grocery chains are even starting to set up produce sections devoted to local produce.  As we are half way through August, I wanted to make sure to include a few delectable egg ideas featuring these ruby beauties.  And what better start than a Caprese-inspired breakfast?  It's yummy, seasonal, fresh and easy.

It all starts with the ingredients:
  • 1 thick slice of ripe tomato, preferable of the meaty "beefsteak" type
  • 1-2 ounces of quality mozzarella (none of the crappy shredded stuff)
  • A few leaves of fresh basil
  • 1 egg

Whenever I make my own pizza, or
anything else requiring mozzarella,
I always go for the ball-form good stuff.
At Trader Joe's you can either buy one large
ball, or this tub of smaller, marinated balls.
For one egg, you only need a little bit
of cheese.  Eye-ball it based on the size of
your tomato slice.  Cut it up into smaller
bits to help cover the top of the tomato.


Turn the broiler on in your oven and
place the tomato slice on an oven-safe dish. 
I wrapped mine in foil, not because
it's necessary, but so I'd have one less
dish that I would need to wash.
Season the tomato with a little salt and
pepper, then top with the mozzarella.


Once you stick the tomato under the broiler, you'll want to get the egg started and wash the basil.
This basil came out of my garden right before I was ready to use it. The younger the leaves, the more tender they are.

Now, here's the thing about sunny-side up eggs.  I spent the majority of my life thinking that "sunny-side up" meant they were only cooked on the bottom side and the top was meant to be a mess of yolk and egg-white snot (eeeew).  It turns out, this really only applies at Denny's or IHOP or any other diner-type place where they don't really care and they just want you to hurry up and eat, pay and go.  A "true" sunny-side up egg should have a completely cooked white, with a bright, cheery yolk.  It's basically an "over-easy" egg, but with less chance of an over-cooked yolk, and a more colorful presentation.  A sunny-side up egg was perfect for this dish because I wanted lots of runny yolk, more color, and since the tomato could be in under the broiler for a few minutes I would have time to let the egg cook more slowly.  Here's how to make a perfect sunny-side up egg: Have your pan heated to "low," add oil or butter to keep the egg from sticking, then add the egg.  Do not cover the pan.  Now, go about your business, wash the basil, put stuff away in the fridge, etc.  The important thing at this point is to watch the tomato/mozzarella until the cheese is melted to your desired gooeyness.  Mozzarella is pretty dense, so it takes a few minutes to get there (temperature of your broiler is also a factor).  Once you think the cheese is nearing a blob-like state, check the egg.  You should be able to touch the egg white with the tip of your finger and feel that it is done.

Take the tomato out of the oven and plate it.
The cheese should tantalizing.
Lay the fresh basil leaves on top.


Now, lay that happy egg on top!  The basil will wilt and become soft and the heat from the egg will keep the cheese from cooling off.  Slice into that stack of summer goodness and watch the yolk spill over the side.  While I didn't eat it with toast (carbs, you know), a bread item would be a perfect accompaniment - helpful for wiping your plate clean of tomato juice, egg yolk, and bits of cheese.

I only have a few weeks left of "tomato heaven" so don't be surprised if you see a few more recipes in the next month that feature my favorite summer vegetable. 

Love & Eggs,

Laura


This egg brought to you by Sophie,
my Cuckoo Marans hen.

Monday, August 13, 2012

1: Bacon & Egg Burger


Mmmmm... Bacon... I've been a recovering vegetarian for seven years.  My ideals are the same, but fortunately for me, awareness of food-related issues in our culture has led to much better options for deliciousness like bacon.  There is something to be said about the role certain foods play in the human experience.  A summer BLT, for example, with garden-ripe tomatoes and thick-sliced bacon.  That BLT transports me to summers in my parents' house, sitting down at the dinner table with my family while the vent over the stove still works to clear the air of bacon grease and smoke.  Or a cheeseburger at 1:00 AM after drinks with friends, pressed über thin with gooey processed cheese melting on top.  It might sound weird, but I firmly believe these things are part of the American experience.  And if there is one thing I value above all else, it is collecting as many experiences as life can offer.

Anyway, I'm done waxing nostalgic about meat (for now).  On to the tasty burger I just ate for dinner!  I've long held the belief that almost any savory food is better when topped with a fried egg.  If you've never had a burger topped with a fried egg, you're missing out.  And a fried egg plus bacon?  Forget about it!  Tasty protein explosion!

I don't think I make burgers the same way twice.  I pretty much combine whatever ground meat we have stocked up in the freezer with diced onions, seasoning salt, a little Dijon mustard, Worcestershire sauce and soy sauce, mix it up and patty it out.  In this particular case, I used one pound each of ground beef (from my husband's family farm), one pound of ground pork (also from my husband's family farm), and one pound of ground venison (I traded two dozen eggs with a co-worker for some of his venison from deer season).  I would post this part of the recipe, but it's really not the important part.  Almost everyone has a great go-to burger recipe, and all of them would taste equally awesome topped with a fried egg and some...


Yeah, BACON.  In this case, the bacon comes from Salume Beddu, a St. Louis business that specializes in cured meats that are locally sourced and naturally raised.  This is some extra tasty peppered bacon that comes from Berkshire hogs.  It costs a fortune on the bacon-scale, but if my options are (A) commercially produced bacon from sad, confined piggies, (B) no bacon, or (C) pricey bacon from a local, independently owned business sourced from heritage breed farms, I'm going to choose "C" all day long.

So, this is my first EGG of my challenge and it's not much of a recipe, but I happened to have leftover burgers that we grilled this past weekend and I thought, "Why not?"  I mean, even if one person reads this and thinks, "I've never tried a fried egg on a burger, but I'm intrigued!" then I'm a happy camper.

So, here's what you need (if you haven't riddled it out already):
  • Burger buns (I always buy the whole wheat Healthy Life brand because they are only 80 calories and a girl has to watch her figure... sometimes)
  • Cheese of your choice
  • Bacon
  • Mayo
  • Lettuce, tomato or any other toppings that float your boat
I'm not going to hold your hand through stuff you already know.  Essentially, you just need to assemble a burger per your desires.  I'd recommend putting the cheese on top of the burger and under the egg.  The heat from the fried egg and the heat from the burger help the cheese get melty.  Plus, when the bacon is on top, it helps it stay crispy.


The most important thing is to not over-cook the egg.  The yolk must be runny to fully appreciate the yum-tastic flavors.  I also love having the bacon on top so that when you push down, the crunchy edges break the yolk open so it oozes out the sides of the bun.  Mmmmm... Drooling yet?


Behold!  An amalgamation of delicious tastes and textures!  Soft, yet toasted bun... Cold, crisp lettuce... Juicy, salty burger... Crunchy, peppered bacon... Rich, runny egg yolk! 

You know you want one.

Love & Eggs,

Laura
This egg brought to you by Brontë, my Silver-Laced Wyandotte.
She's the black and white one in the back.